
Keepers Forum
Seed Germination and Clone Acclimation for Healthy Plants

Seed Germination and Clone Acclimation For Healthy Plants
Starting strong is everything in cultivation. In this guide, I’ll walk through how I germinate hemp seeds and how I root and acclimate clones so they grow into vigorous, healthy plants.
Why the First 2–3 Weeks Matter So Much
The germination and early rooting stage is when plants are most fragile. Any major stress—too much water, heat, cold, or light—can stunt growth for the rest of the cycle or kill the plant completely. By dialing in this stage, you set yourself up for better vigor, yield, and consistency later.
Part 1: Germinating Hemp Seeds
There are lots of ways to pop hemp seeds. Below is a simple, repeatable process that works for most growers.
Step 1: Prepare Your Environment
Keep the room warm, around 70–80°F (21–27°C).
Aim for moderate to high humidity (60–80%) to stop the seed from drying out.
Keep things clean: wash your hands, use clean tools, and avoid touching the seed/taproot as much as possible.
Step 2: Pre‑Soak + Paper Towel Method
You can either plant directly after soaking, or use the classic paper towel method to let seeds crack and show a taproot before they go into the medium.
2A. Pre‑soak the seeds
Place seeds in a clean glass of room‑temperature water.
Let them soak for 8–24 hours until they sink or the shell just begins to crack.
As soon as they sink or show a tiny taproot, remove them from the water so they don’t drown.
2B. Move to the paper towel
Wet two plain, unscented paper towels with clean water, then squeeze out excess so they’re damp, not dripping.
Lay one towel on a plate, spread the seeds on it with some space between them, then cover with the second towel.
Slide the plate into a slightly open plastic bag or cover it with a second plate to keep moisture in while still allowing a bit of air.
Keep the setup warm and dark (around 70–80°F / 21–27°C).
Check once or twice per day. The towels should stay moist; if they start to dry out, mist with water. Within 1–5 days, most viable seeds will crack and show a white taproot.
2C. Plant as soon as taproots appear
When the taproot is about 0.25–0.5 inch (0.5–1 cm) long, it’s time to plant.
Handle seeds very gently by the shell, avoiding direct contact with the taproot.
Place each seed taproot‑down into your starter medium (soil, coco, plug, or cube) about 0.5 inch deep and lightly cover.
Step 3: Maintain Warmth, Darkness, and Moisture
Keep seeds in a warm, dark place or under a humidity dome.
The medium should stay moist—not soaked. Overwatering is one of the main reasons seeds fail.
As soon as seedlings break the surface and open their first leaves, give them gentle light 18–24 hours per day.
Part 2: Rooting and Germinating Clone Snips
Clones (cuttings) let you copy a plant with known traits—CBD/THC profile, terpene profile, growth pattern, and overall vigor. Getting clean, well‑rooted clones starts with good technique and a stable environment.
Step 1: Take Healthy Cuttings
Choose a disease‑free mother plant with strong growth.
Take cuttings from firm, healthy branches—not weak or heavily shaded growth.
Each cutting should have several nodes and a sturdy stem.
Immediately place cut ends in clean water so no air bubbles get into the stem.
Step 2: Prepare the Cuttings
Trim off lower leaves so they don’t sit in the medium.
Make a fresh 45‑degree cut at the base of the stem with a clean razor or scissors.
(Optional but recommended) Dip the cut end into a rooting hormone gel or powder to encourage fast root development.
Step 3: Insert into Your Rooting Medium
Common options include:
Rooting plugs (like Rapid Rooters or similar),
Rockwool cubes,
Light, airy soil or coco in small cups.
For any medium:
Pre‑moisten so it’s damp but not dripping.
Use a small tool to create a pilot hole so the gel doesn’t scrape off.
Insert the cutting gently and firm the medium around the stem.
Step 4: Create a High‑Humidity Environment
Fresh clones don’t have roots yet, so they can’t drink much water from the medium. They drink through their leaves.
Place clones under a humidity dome or in a propagator.
Aim for 70–90% humidity for the first few days.
Keep temperatures around 72–80°F (22–27°C).
Use a low‑intensity light (LED dimmed down, fluorescent, or raised high above the dome).
Mist lightly as needed, but avoid leaving huge droplets on the leaves for long periods—this can invite mold.
Step 5: Monitor for Root Development
In the first few days, focus on keeping humidity and temperature stable.
After about 5–10 days, you should start to see roots poking out of the plugs or cubes.
Gently tug the cutting: a bit of resistance usually means early root growth.
Once a good root system forms, clones are ready for the next stage: acclimation and transplant.
Part 3: Acclimating Clones (Hardening Off)
Newly rooted clones have been living in “easy mode”: high humidity, gentle light, and very little stress. If you suddenly expose them to strong light and dry air, they can wilt or stall. Acclimation (also called hardening off) lets them adjust gradually.
Step 1: Slowly Lower Humidity
Over 3–7 days:
Start by cracking the dome or opening vents for a few hours per day.
Each day, open the dome a little more and increase air exchange time.
Watch the leaves. If they droop hard, you’re moving too fast—close the dome and slow down.
The goal is to bring the clones down to the same humidity as your veg room without shocking them.
Step 2: Gradually Increase Light Intensity
At the same time:
Begin with the light further away or dimmed.
Each day, move the light slightly closer or increase intensity.
Avoid jumping from very low light to full power overnight—this can bleach or stress the clones.
If leaves curl up, bleach, or look “tired,” dial the light back a bit and give them more time.
Step 3: Transplant into Final Veg Containers
Once clones can handle normal room humidity and light:
Prepare your pots with your preferred soil or coco mix.
Make a hole just big enough for the plug or cube.
Transplant gently, filling around the sides and lightly firming the medium.
Water in with plain, pH‑balanced water or a very light nutrient solution.
For the first week after transplant, keep the environment stable—no big swings in temperature or light. Once you see new growth, the clones have fully acclimated and are ready for regular veg.
Final Thoughts
Whether you’re starting from hemp seeds or clone snips, success comes from stable conditions: clean tools, consistent warmth, moderate to high early humidity, and gentle light. By treating germination and acclimation as their own dedicated phase, you build a stronger root system, reduce plant losses, and set up your hemp crop for better results down the line.
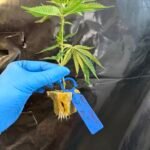 Clones
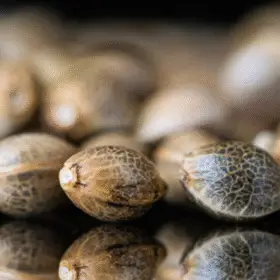 Seeds
Seeds